
WOW.. What an experience. You go through such a roller coaster of emotions when you start this endeavor. From the time I completed and submitted the application to the very end when you get your class photo. But I made it. Whew.......


 Shabby chic embossing with paint...I want to try this again.
 Altering metal and the embossed foil was so cool!
 Layering inks- stepping out of my color pallet....FUN!
 Grunge, foil and layering inks....I want to play!!!
 More foil and tranfer and sticky back canvas (my fav was the canvas, far right)
 Ink washing - this is a must do again.
 Distress markers and embossing powders - love altering things!!!
 Dylousions Sprays - Oh So Pretty!!!!
 Glossy Accents and colloage art - reminds me of school when I made the heart.
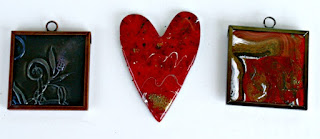 The Melting Pot and Utee!!!- My new best friend!
 Stickles and Liquid Pearls - LOVE!


 Kaz - she loves her "stashes" and I love her accent. She is from England. She taught me a word..."gobsmacked" = I am over whelmed/blown over. There was another one but I best leave that one in my head...lol
 Kate, Dy and Kaz being silly- The 3 amigos!
 Alain, one of the owners took a bath in yellow stickles and this is what the coat looks like. It is stiff as a board and they are protecting it carefelly...it is really funny to see. He was wearing when they dumped the stickels on him....lol
 Tim and Claudine teaching- Tim is such a ham and there is a very funny side to him. It took all I had to hold back those 3 days. Especially when he started talking about his "cracks". Claudine is so sweet and gental but don't let those looks fool you, she is one sharp cookie!

 Ranger U Graduating Class of May 4 - 6 2012 @ Ranger Ink in Tinton Falls; New Jersey. I cannot tell you have much I really enjoyed myself.
Thank you for stopping by... Have a great day!


Last fall when I applied, I did not think I had a snowball's chance in hell to get selected to go. They only pick 24 students for each class each year. There are two of them, late April and early May. Then you wait until late March for the email...Yes...No. I got the one that said "CONGRATULATIONS". I was in shock, totaly. Yes, I sure was. Still am. But the journey has only just begun.
Booking the flight and hotel was "ok"... took a bit to find a flight that would get me to NJ at a decent hour. Sea Tac, however, have some rude TSA agents. Honestly, I do not travel much and I forget the "finner" details about traveling. So when I thought I would travel "light", I thought I had my plan all organized. Usually when I fly, I check ALL of my bags because I hate waiting for all the sillies to put their over stuffed carry-on's in the overheads. So, I get to security, unload my laptop (I knew to do this) took off my shoes (knew to do this) and put everything in plastic bins (knew to do this). Watch my luggage/laptop go in the machine and they never came out!!!! The next thing I hears is "LUGGAGE CHECK" and still not understanding and waiting for my bags, the TSA dude came up to me WITH my bag and asked if it was mine... Yes Sir, it is??!!! Well, we have a lesson to learn, he says'. Taking all the stuff out of my bag (in front of everyone, who are by now all watching me) and lays out my plastic bag of hair stuff, tooth paste and so on. Well...Did you know you are suppose to take this bag OUT of your luggage? No Sir, I do not really fly that much and rarely take carry-on luggage, why? "These bottles are not legal" WHAT!!!... Oh shoot... "do you want to toss them or check the bag?" me- "I paid good money for that stuff and I am not tossing it"...he- then you have to check it. me- then you put my stuff bag in my bag and I will.. by now I am getting upset and he is being a turd and everyone is staring... So he walks me out of security, holding my bag for everyone to see and does not even give me a kiss when he is done. I was so embarrased. Jerk.. bag checked and I finally get on the plane.
5 + hours later, we landed. Had a nice ride to my hotel, time to check in. OH MY GOSH!!!!!! She asked for my ID.. I had it in my pocket. Where is it? As I tear through all my stuff, GONE! Crap, the last time I saw it was when I check in my bag. UGH... then my brain flashed.. I called United and asked them if they could check the seat I was sitting in because I may have left it there because I vagely remember something dropping in between the seats.... "no, they will not take out the seats to get My Driver licenses". How do I get back on the plane, I ask. The response was not what I wanted to hear. Called my husband and he is in a panic.. Wife stuck in NJ!!!... then I my heart hits the floor.... WAIT.... I run to my wallet and peak in a secret place and there is my PASSPORT!!!... I started to cry... day saved.
Ok, The next 3 days are very intense and jammed packed full of information and skills and tricks and secrets. I made 80 tags over those 3 days, using a varitiety of techniques. You arrive at 9 am sharp and you are there in class until 6 pm...long days.
Day 1 - We got a tour of the plant. They make everything there. All by hand, with some help from machines of course. Those Distress ink pads, they are put together by hand! Not a machine. Boy did those girls have some pretty fingers. Darn good thing they had gloves on. What fun, I got to pick a bottle of stickles right off the assembly line..Whoo Hooo! Ok, tour over we have to get to work and start making our tags. Some of the tags are shown below.

Perfect Pearls - I did not know that you could do so much with this beautiful fine powder. My favorite in this section was the Faux Suede tag. It looks and feels like leather and the colors on the paper are just beautiful.


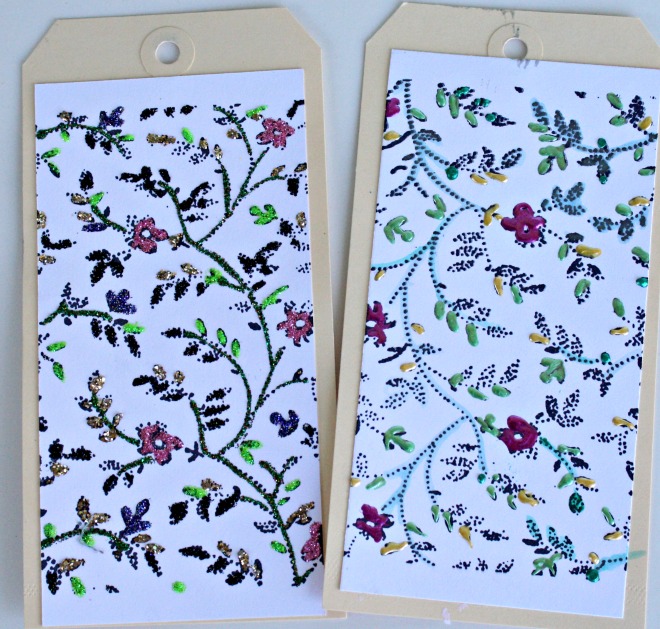

My most fav of all - altered metal art. Using the Melting pot is going to change my neckline alot...lol
I cannot leave out all the fun we had and the food!... Mario took really great care of us. Square pizza was on the agenda this day and the salads were awesome!
Then, there are the great people that you meet. I was not able to get all of their pictures, I had my head buried in projects. :(


Dy teaching - she is a hoot. I did not know what to expect but I loved her personality. She is whitty and funny and very sincere. Love her!
After 3 long and very intense days of learning, it was time to leave and I almost cried. I wanted to stay and learn more. But it was time to take the final picture:

Thank you for stopping by... Have a great day!


