Showing posts with label Crate Paper. Show all posts

Wednesday, July 4, 2012

Celebrate Family Designed by Carla Oliveira


Celebrate Family Designed by: Carla Oliveira 
http://carlascuriouslycraftychaos.blogspot.com/ 
Featuring Crate Paper Portrait Collection 


Choose your patterened papers, cut to size of pages of the mini album and adhere to the pages. Front cover: Cut accent cut outs and adhere to cover, make a bow and add ribbon. Add accent celebrate and family stickers. Instructions for putting the album together: Page 1 cut pp, use decorative scissors around edges, add Maya Rd flower, 7 Gypsies gaffer tape as a border and leaves and flowers. Page 2 Tear patterned paper in half and add to page like a pocket. Make a tag out of scraps of pp add to pocket. Add a strip of music notes and I am roses flowers. Page 3 Cut patterned paper, add oval accent cut out to center, adhere strip of ribbon to the side and a bow. Then add a strip of music notes. Page 4 Use square red edged accent cut out, add sticker to the corner, prima flower, leaf and Martha Stewart butterfly. Page 5 Use Sizzix Tim Holtz die cut hanger and banner. Put together with fiber and adhere to page. Add accent cut out square to page. Page 6 Cut out patterned paper, adhere to page and use the bottom part to make a pocket. Add sticker to the tag that you make with scraps of paper, add another sticker to the center of the pocket. Page 7 Cut and distress edges of paper, and ink the edges with the distressing ink. Do the same with the accent cut out. Add to page with a sticker to the corner and a Prima flower. Page 8 Cut patterned paper out to fit page, punch holes in each corner, add fiber. Add Maya Road flower to corner along with the cinema sticker. Page 9 Adhere dictionary paper to page, double stack accent note cards together at an angle. Adhere to page along with the oval accent note card. Add ribbon and bow to the bottom of the page. Page10 Tear patterened paper with decorative ruler, make a border and a mat. Ink the edges with Tim Holtz distressed ink. Make a pocket for the bottom of the pages by tearing the paper and inking the edges. Make a tag with scrap paper and accent note card, add fiber. Page 11 Draw lines in canvas page for journaling. Make border with decorative scissors. Ink edges. Add sticker circle to the corner, and cut a punch shape out add to sticker. Page 12 Adhere dictionary paper to page, add piece of paper and accent note card. Add sticker to the corner and a Martha Stewart butterfly punch out.


Supplies: The Hens Den Shabby Chic mini album Crate paper Portrait Collection, patterened paper, sheet of note cards and stickers. Maya Road Winter Roses, Houndstooth Licorice. Maya Road green gingham ribbon. Maya Road striped ribbon sunflower Music notes double sided papers Dictionary double sided papers Tim Holtz Tonic scissors Tim Holtz distress ink barn door Tim Holtz distress ink scattered straw Fiber 7 Gypsies gaffer tape I am Roses flowers and leaves Prima Flowers Decorative scissors, Sizzix Big Shot, Tim Holtz hanging sign dit cut, Fiskars decorated edge rulers, Martha Stewart butterfly punch.


Monday, January 2, 2012

Pretty as a Princess Card using Crate Paper ‘Emma’s Shoppe’ Collection by Becky Garrison


“Pretty as a Princess Card”

Designed by:  Becky Garrison 


Supplies:
·      Base card stock – Bazzill Basics
·      Patterned paper – Crate Paper Emma’s Shoppe collection ‘Quilts’, and ‘Sweets
·      Journaling cards - Crate Paper Emma’s Shoppe collection ‘Accent Cuts
·      Stickers – Crate Paper Emma’s Shoppe collection ‘Phrases
·      Flowers – Prima ‘Innoscence 2’
·      Pearl Gems – Prima
·      Sentiment –  ‘Pretty’ from Crate Paper Emma’s Shoppe collection ‘Accent Cuts'
·      Lace – The Hens’ Den
·  My stash - Vintage Button and twine,  Brown Ink, 'as a Princess' Stickers

Tools: (from my stash)
·      Martha Stewart/EK Success Paper Trimmer & Scoring Board. Fiskars ‘Apron Lace’ Border Punch, Scissors, ruler, craft knife

Steps:
·       Cut card stock to 6 ½” X 10”
·       Score card stock at center of 10” side, making the card 6 ½” X 5”; fold and press fold.
·       Cut piece of ‘Quilts’ paper to 6 ½” X 5”.  Adhere to front of card.
·       Ink edges of card with brown ink.
·       Cut piece of ‘Sweets’ paper to 5” X 2 ½ ”.
·       Using border punch, add decorative border to long edges of paper.
·       Ink edges of paper.  Adhere to front of card.
·       Trim two journaling cards from ‘Accent Cuts’ paper.  I used one with a white oval surrounded by pink on pink polka dots, and the one that says ‘Pretty’.  Trim the journaling card that says ‘Pretty’ along the lines to make the decorative label.
·       Add sticker sentiment to bottom journaling card.
·       Ink edges of journaling cards.  Adhere to front of card.
·       Add two stickers (green and white oval, and ballet ticket) to front of card.
·       Apply pearls to oval sticker.
·       Ink edges of the Prima flowers.  Adhere to front of card.
·       Cut a small slit (just larger than width of lace) in the fold of the card, just above the bottom.  Thread lace through slit, tie into a bow.
·       Thread ribbon with cotton twine and adhere to center of the lace bow.

Friday, May 6, 2011

Lets start the Celebration, Giveaway, and National Scrapbooking Day!

 We are so very excited to announce the new kits in the store!

Each kit comes with:

  • Pre-cut paper ready to go!
  • All the goddies
  • Photographed DETAILED instructions.

If you have ever taken a class with Cheri you will know what kind of quality you are receiving. Her instructions are very easy to follow! We have never been more excited to have her make up class kits for sale available to those that are farther away than where she has been able to teach!


--------------------------------------------------------------------------------------


 CUTE and CHUNKY album has 8 board pages for a total of 16 pages with an additional 4 insert pages. Adhering to chipboard can sometimes be tricky I found that Claudine Hellmuth Studio Multi Medium works really well.


--------------------------------------------------------------------------------------


Created by Cheri Piles for The Hens Den
  

Once Upon a Springtime papers are so magical with the fairy's. Mini envelope album 5 pages (10 total) with 5 pocket inserts for additional photo's. 
***Optional items needed: Distress ink by Tim Holtz – Walnut stain. Bazzil cardstock if you would like to layer your pieces.


--------------------------------------------------------------------------------------

Created by Cheri Piles for The Hens Den

 This wonderful little album has 5 pages (ten total) and 5 insert pocket pages. *Optional items for album available in the store: Black soot distress ink by Tim HoltzBazzill cardstock in black and cream.


--------------------------------------------------------------------------------------

Created by Cheri Piles for The Hens Den

***Optional Items: White Studio Paint by Claudine Hellmuth, Spun Sugar ink stains byTim Holtz (Ranger). 


--------------------------------------------------------------------------------------

Created by Cheri Piles for The Hens Den


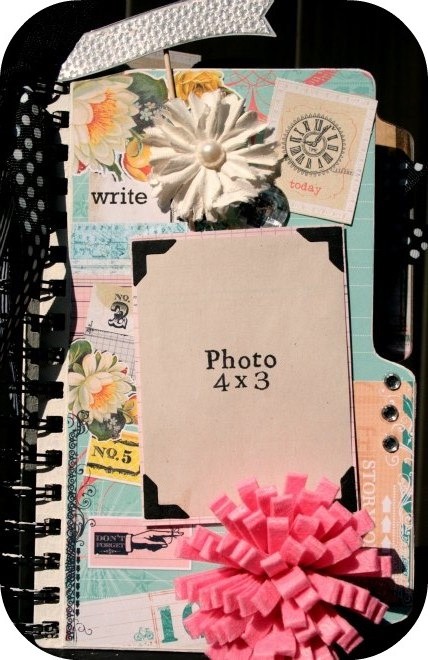
This book was designed in a way that you can add your photograph on the 1st journal page of each section, document it in the additional journal pages, add any additional photo’s in the photo insert pages and a place to keep pamphlets or tickets in the pocket page per section.

*Optional - for additional dimension you can ink all of your edges with Tim Holtz distress ink. If you decide you like the added look, it is easier to do this prior to assembling your album.
*Optional – photo corners in black. Matt your photo’s in black cardstock.


And now onto the giveaway!
I am giving away a BRAG Book KIT to one lucky winner!! The giveaway will last From Friday until Sunday at 8pm pacific time. All you have to do is leave a (that's one per person) comment!

For additional comment entries you may:
  1. follow the blog and comment that you followed us
  2. tweet the link to this blog post and come back and comment with your twitter name
  3. like us on facebook and come back and leave a comment that you liked us
  4. share the link on facebook and come back and leave a comment with your fb name
  5. blog about us and come back and leave your blog name when you comment

That's a total of 6 chances to leave a comment to win the kit!

There's MORE!! For every 50 comments we will add another kit to the giveaway! So if we get 100 comments we will add one of the other kits and so on and so on! 

Good luck to you all, I hope you like the new kits as much as I do! 

Have a wonderful National Scrapbook Day to you all!!


Related Posts Plugin for WordPress, Blogger...