Showing posts with label Teresa Collins Designs. Show all posts

Friday, January 25, 2013

Just Remember I love you

Just Remember I love you pocket Valentine
by Lori McClellan
featuring Teresa Collins, Tim Holtz, and Petaloo

I have to admit, I love making Valentines.  This is one of my favorite things to do with my kids.  It has become tradition to mass produce the class valentines on Super Bowl sunday.  While the guys watch the football game, the girls craft the night away.  In my opinion, it is a total win-win situation!  

So as the big day approaches, I am starting to plan out some Valentine ideas, and I thought I would share with you.  If you order supplies from The Hens Den, with their super fast shipping you can have all your supplies you need in time for a Super Bowl scrap-fest of your own.

Start by gathering your supplies.
Adhesive
Sewing machine (optional)
Circle punch


Create your pocket by folding a cardstock rectangle in half.  Sew around 3 sides, leaving one for an opening.  Use the circle punch to cut the tab at the top.  Tie the burlap ribbon on the side.


The base is a Tim Holtz journaling tag.  The Teresa Collins, I love you sticker, is popped up on the tag.  And to finish it off, I used a petaloo flower.  Add some adhesive to the back and stick the tag to the pocket.

All that's left is to add your name in the blank space on the tag, fill it with treats and give it someone you love.

Thanks for stopping by.  Remember to check out The Hens' den What's on Sale page  to find some great deals on supplies to make your own Valentines.


Tuesday, January 15, 2013

Introducing Chic Sketches by The Hens Den

Introducing "Chic Sketches" 
exclusive to The Hens' Den 
by Lori McClellan

Ever wish you had a starting place when you sit down to scrap?  I know that I do, and having a sketch  makes it SO much easier to get started.  This year I will be developing sketches to help us over some of our scrapping hurdles.

Today I have a sketch for all of you to play with.  I know that most of us have a box or drawer full of pictures that are waiting to be preserved.  This sketch has places for multiple pictures.  Getting more than one picture on the page is a great way to get started.


Does this sketch look familiar?   When I was preparing my post for the blog, I found myself stumped and turned to this sketch.  I wanted a layout I could use several pictures on.  Also I had this beautiful line from Teresa Collins and it begged to become a Christmas layout. 
 

The Hens' Den has so many beautiful product lines that this sketch comes together with 3-5 sheets of coordinating papers and a couple of embellishments to complete the theme your page takes on.  

I would LOVE to see all the different takes on this sketch.  Remember to post a picture in the Hens' Den gallery for a chance to win a "Chic" chipboard album

Also as I will be designing a lot more sketches to come, please let me know some of the types of sketches you want to see.  I love feedback and will try to develop sketches to help you fill your albums this year.  

Thanks for stopping by and Be Scrappy!

Monday, January 14, 2013

Christmas 2012 Layout - Teresa Collins Fabrications Collectons

Christmas 2012 Layout
Featuring Teresa Collins Fabrication Linen Collection
Designed by Lori McCellan


Hi everyone!  I am so excited to be back for another year with The Hens Den.

For this layout I used the Teressa Collins -  Fabrications Linens Collection.  I love the colors,  especially for a Christmas layout, they were perfect!


Now all that is left is to add the pictures and bit of journaling.

Thanks so much for looking and remember that The Hens' Den has a great variety of amazing products for all your scrapbooking and memory making needs

Thursday, January 10, 2013

Teresa Collins Vintage Finds by Carolyn Lontin


Teresa Collins Vintage Finds by Carolyn Lontin


Moments Layout

Designed by Carolyn Lontin


Good Morning & thanks for stopping by the Hens Den Blog today!

My layout features Teresa Collins' Vintage Finds product line - this is such a  fun and versitle line that will work with almost any photos!!

My photos are of my son as he is about to leave with some friends to do something on his own that he has wanted to do for a while now.  I left some scraps of the back side of Vintage Finds Dots paper for my journaling. 


Directions:

Use black card stock for the base of your layout - I do this on about 99% of my layouts, I like the thin line to border my layout, it gives the eye a place to stop and it makes the layout sturdy.

Trim Vintage Finds Black Damask paper to 11.5x11.5, distress and ink the edges then attach to the black card stock.

Using black card stock mat two 3x5 photos then attach to layout.

Cut out three Bingo cards from Vintage Finds Bingo paper, distress and ink the edges then attach to the layout.

Add embellishments from Vintage Finds Die Cuts and Chipboard Elements #2

Use a notebook punch on scraps of Vintage Finds Dot papers, distress and ink the edges then add to layout using Tiny Attacher.  Add date stamp to scraps.


Friday, January 4, 2013

Brrr Birthday!- By Moriah Macdonald

Featuring-Teresa Collins Everyday Moments

Brrrrr!  It was 7 degrees Fahrenheit when I got up yesterday!!!  Nothing like a frigid morning temp to wake you up and inspire you to spend time gettin' crafty. :)  I'm sad for the cold, but happy for the snow.  Don't get me wrong, I don't enjoy shoveling, but gosh it is pretty when it blankets the ground.  I always look at snow as a chance to reset our color palette.  We have all the vibrant Summer colors, the warm colors of the Fall, and rich jewels of the holiday season.  The quiet white of Winter reminds me to slow down & breathe (although not too much or I'll freeze to death!), take in the crispness and refocus.
Along with that refocus is a renewed effort on my part to send birthday cards!  What's that saying- The Shoemaker's kids never have shoes?  That's my poor family and friends.  The rarely get their birthday cards on time. LOL!  Well this is one card that is going to be ready!!!  A gal pal of mine (a fellow Upstate New Yorker living in MA) has a birthday coming up in February and this frosty fella is a fun way to say happy birthday. :)  
The hills were cut freehand using paper from an Everyday Moments 6x6 pad.  The patterns in 6x6 pads are great for smaller projects like this because the designs are scaled down and less overwhelming on a card.  Since this is a clean-ish design, the pattern and some foam tape add the dimension.  The foam taped hills also made it possible to tuck Mr. Snow amongst the hills, which totally adds to the cuteness factor.

Hope wherever you are you are staying warm, and if you are somewhere that doesn't get snow- enjoy this frosty viewing!

Supplies:
Paper- Everyday Moments 6x6 pad (Teresa Collins) 
Adhesive- Score Tape
Stamps- Swanky Snowdudes (Paper Smooches)
Ink- Tuxedo (Memento)
Markers- Buttons-B24, Hat/Scarf-B02, B05, Nose-YR07, Y38 (Copic)
Card Base- Bluebird (Memory Box)


Thursday, January 3, 2013

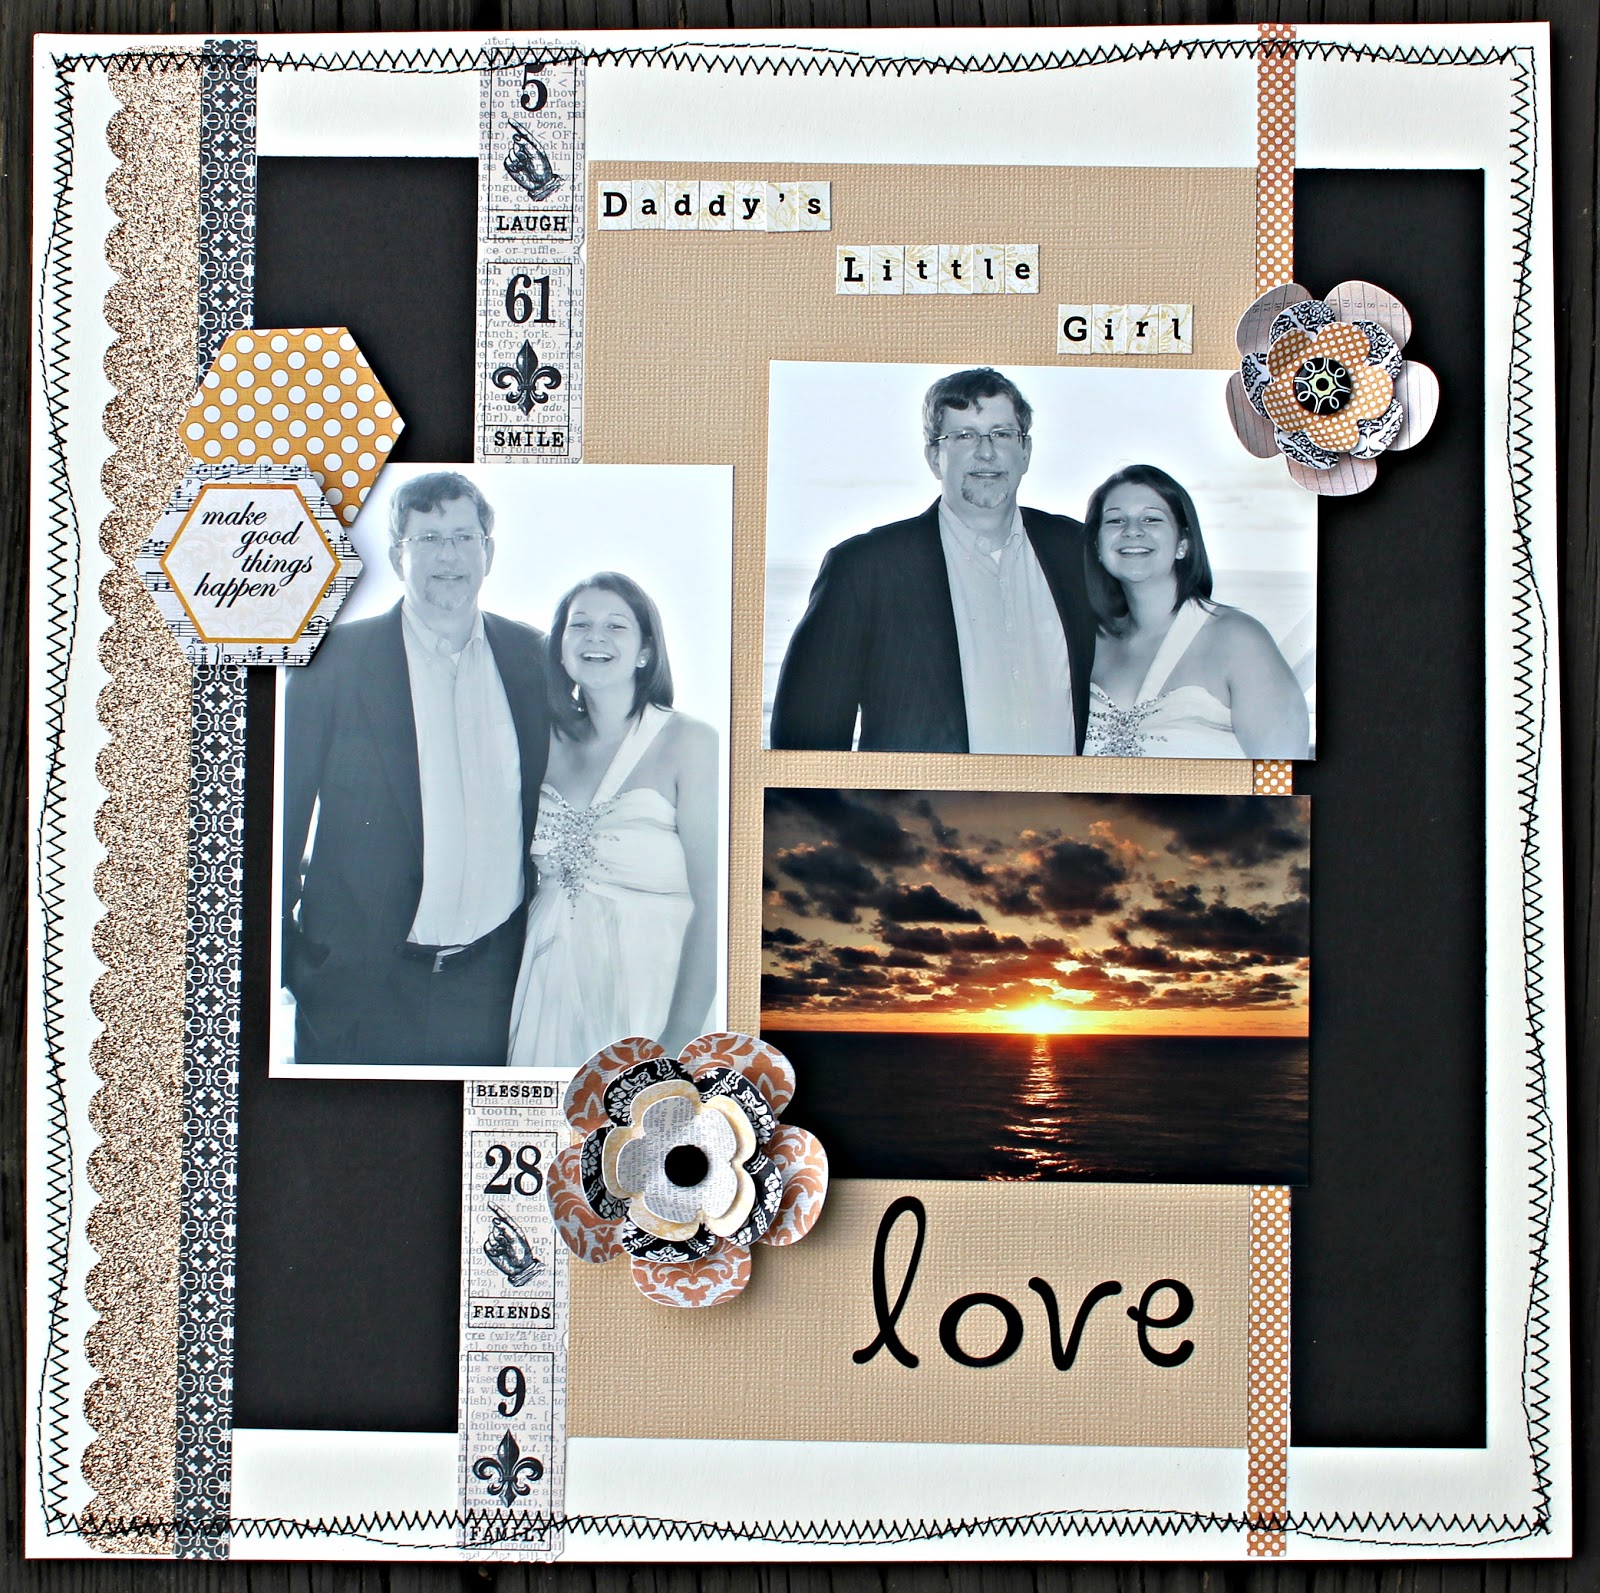
Daddy's Little Girl - by Anita Mulcahey - Design Team Member for The Hens Den

 Teresa Collins Vintage Finds
Daddy's Little Girl
Created by:  Anita Mulcahey
Hello Everyone:
Hope that you all had a wonderful New Year and an awesome holiday season.  I am really enjoying having my daughter home from Georgia Tech for her three week break.  Sadly she goes back on Saturday.  When I saw these lovely Teresa Collins Vintage Finds I just knew that I wanted to scrap some father daughter photos from her graduation cruise this past June.  I made two of the photos black and white and left the gorgeous sunset that was behind them just the way it looked.  We had a gorgeous view with our balcony off the back of the boat.  Colleen truly is Daddy's little girl and they bond over their love of all things nerdy given that he is an engineer and she is studying to be an engineer.  Below are the links for the products that I used from the lovely Hens' Den store.  I do have to just gush over the die cut borders which are to well, die for.  I also loved the die cut flowers which have a hole neatly punched in them so that you can use a brad if you so desire.  Teresa Collins is the best and I am so glad that Charlie sent me all these wonderful goodies.

Layout Materials:
Teresa Collins Vintage Finds Sticker Sheet #2
Teresa Collins Vintage Finds 36 Die Cut Flowers
Teresa Collins Vintage Finds Die Cut Borders
Tim Holtz Coredinations Distress Collection
Black and Cream cardstock
Brads and stickers from personal stash
Hugs,


Monday, December 31, 2012

Teresa Collins Vintage Finds layout by Carolyn Lontin


Teresa Collins Vintage Finds by Carolyn Lontin


Memories Layout

Designed by Carolyn Lontin


Use cardstock for the base of your layout

Trim Tiles paper to 11.5x11.5 then attach to cardstock

Cut a piece of Clocks paper to 2x11.5 then attach to layout

Attach both border strips from Die Cuts to layout holding in place using Tiny Attacher

Gently sand the edges of one 4x6 photo then attach to layout

Add embellishments from Vintage Finds Collection - Chipboard Elements 2, Die Cut Flowers, Die Cut Sheet and Stickers Sheet 2, using pop dots under some elements to add dimension

Add black Jewles


Monday, December 10, 2012

Teresa Collins Vintage Finds layout by Carolyn Lontin


Charming Layout

Designed by Carolyn Lontin

Featuring: Teresa Collins Vintage Finds


Directions:
Use black cardstock for the base of your layout

Trim the back side of Dots paper to 11.5x11.5, distress and ink the edges then attach to cardstock

Use the scrap of the Dots paper (about .5 x 11.5 strip) distress and ink the edges then attach to layout using Tim Holtz Tiny Attacher

Spray black ink on the patterned paper

Add two 3.25x5.25 photos to layout

Create a cluster at the top left side of the two photos using Die Cut Flowers (ink and distress the edges), Chipboard Elements and stickers from Sticker Sheet #2.

Create a cluster on the right side of the photos using Bingo Charming card cut from Bingo patterned paper attached with 3D Foam Squares, (ink and distress the edges), Die Cuts attached with 3D Foam Squares, Chipboard Elements and stickers from Sticker Sheet #2.

Under the left photo use Twill, Die Cuts (stamped with date stamp) and Chipboard Elements


Related Posts Plugin for WordPress, Blogger...