Showing posts with label Saturdays. Show all posts

Wednesday, August 29, 2012

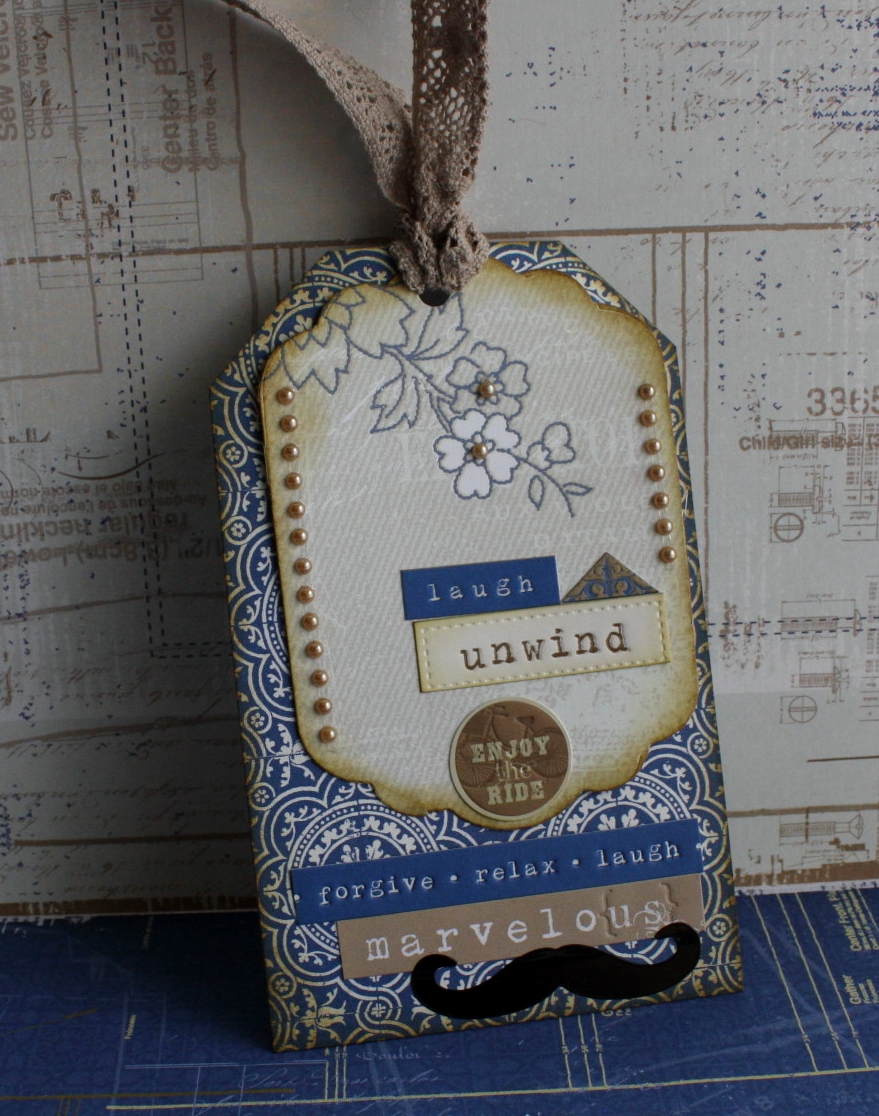
Marvelous Tag with Theresa The Scrapbooking Queen


"Marvelous"
Designed by: 
Featuring:
Little Yellow Bicycle ~ Saturday Collection


Instructions:

  1. Cut a tag for your base 
  2. Cut a second tag (used my spellbinder die) 
  3. Distress edges using Tim Hotz Distress Ink ~ Vintage Photo
  4. Using LYB Sticker Embellishments to create your wording
  5. Add some matching micro pearls to bling your tag
~~~~~~~~~~~~~~~~~~~~~~~~~~~~~~~~~~~~~~

Monday, August 13, 2012

Timeless Card by Theresa The Scrapbooking Queen.


Timeless Card 
Designer by: The Scrapbooking Queen
Featuring collection: Little Yellow Bicycle Saturday Collection


Instructions:

  1. Start with a selecting a collection of matching papers 
  2. Cut your main card focal point, The Queen chose "Lose Yourself/Lovely Labels"
  3. Ink around the edge with Tim Holtz Distress Ink Vintage Photo
  4. Using the reverse side of the "Lose Yourself/Lovely Label" create a banner
  5. The Queen use "Timeless" from the "Fresh Verse" Sticker Collection
  6. Using a base denim blue card stock create a small boarder around 
  7. Create a larger boarder with "Blue Reverie" Paper from LYB Saturday Collection
  8. Place on the base denim blue card stock to create your card base
  9. Lastly use RED twine to create a tassel and tie colors together

Monday, July 30, 2012

Saturday Friends with Theresa the scrapbooking queen.


Saturday Friends ~ Little Yellow Bicycle
The Scrapbooking Queen
www.thescrapbookingqueen.com

The Queen was blessed to attend CHA this year in Chicago 
and one of her dearest friends live close.
So we got to spend the weekend together and tour
downtown Chicago via a Double Decker bus. 
Good times and fun Saturday...


Instructions:
  1. Choice a base paper for your layout stage and theme
  2. Cut matching papers strips for banner back drop for photo
  3. Add pre-printed sayings "It's All Good"
  4. Stamp a fitting sentiment on a Kraft paper tag and distress it with Tim Holtz Distress in Vintage Photo.
  5. Assemble the pre-cut flowers and arrange them around your layout.
  6. Add some more pre-printed saying to your layout for tying into theme
  7. Photo of your choice to bring the whole "Saturday Friends" Theme together.
If you missed it this last weekend we are having a giveaway and a chance to get the know the team!

~~~~~~~~~~~~~~~~~~~~~~~~~~~~

Monday, July 23, 2012

Layout by Carolyn Lontin featuring: Little Yellow Bicycle - Saturdays


Designed by Carolyn Lontin
Featuring: Little Yellow Bicycle Saturdays Collection


Use cardstock for the base of your layout

Trim Little Yellow Bicycle - Saturdays - Lose Yourself/Lovely Labels to 11.5x11.5, distress the edges then attach to cardstock

Cut two pieces of Little Yellow Bicycle - Saturdays - Collage/Easy Breezy - 10.5x3 and 9.5x5, distress and ink the edges then attach to layout

Cut a piece of  Little Yellow Bicycle - Saturdays - Pants and Patches/Burlap Bag to 9.75x1, distress and ink the edges then attach to layout
Add ENJOY from Little Yellow Bicycle - Saturdays - Fabric favorites adding a piece of twine behind the letters.  Hold the twine in place using staples

Add flowers, circles and brads from Little Yellow Bicycle - Saturdays - Fabric favorites and Little Yellow Bicycle - Saturdays Paper Flower Kit


Thursday, June 28, 2012

Little Yellow Bicycle Saturdays Bladin Layout by Nicolle Kramer


Bladin
Designed By: Nicolle Kramer
Featuring: Little Yellow Bicycle - Saturdays Collection

My son Bret was 5 or 6 in these pictures learning how to roller blade. 


Supplies:


Little Yellow Bicycle-Saturdays- Cottage Dreams/ Well- Worn Wood


Preparing Your Page Components:


  • Base is the 12x12  Cottage Dreams/ Well Worn Wood. Distress Edges.
  • Cut 4 1/2" x 12" from Lose Yourself/ Lovely Labels Paper.
  • Cut 9"x 8" from Pants and Patches/ Burlap paper.
  • Cut an 8" circle from Collage/ Easy Breezy Paper.
  • Cut 2 2 1/2" circles from Lose Yourself/ Lovely Labels and Pants and Patches/ Burlap Bag
  • Cut 3 photo to the size of 3"x3" each. I used pomegranate Bazzill paper to mat each photo 1/4" bigger all around.
  • Cut blue chipboard shape frame in half.
  • Distress all edges of all papers.
Assembling your layout:
  • Attach  4 1/2" x 12" from Lose Yourself/ Lovely Labels Paper off to the right on  Cottage Dreams/ Well Worn Wood paper.
  • Attach  9"x 8" from Pants and Patches/ Burlap paper and center on layout.
  • Attach  8" circle from Collage/ Easy Breezy Paper to the right over the  Pants and Patches/ Burlap paper.
  • Attach photos with 3d foam squares onto the  8" circle from Collage/ Easy Breezy Paper.
  • Attach   2 2 1/2" circles from Lose Yourself/ Lovely Labels and Pants and Patches/ Burlap Bag. One to the top left of 8" circle and bottom right.
  • Attach chipboard shapes tucked under photos as shown above.
  • Attach card stock stickers and paper flower at bottom right corner of layout.
  • Attach the rest of the card stock stickers and chipboard shapes as shown above in photos.
  • I used a sketch for inspiration to create this layout.

Related Posts Plugin for WordPress, Blogger...