Showing posts with label Carla. Show all posts

Thursday, November 1, 2012

Christmas Card by Carla using Graphic 45 Christmas Emporium


Happy Holidays 
Designed by: Carla Oliveira http://carlascuriouslycraftychaos.blogspot.com/ 
Featuring Graphic 45 Christmas Emporium

 
Directions: Cut out the Joyous Noel to fit the car and adhere to the card. Cut out the toys off of the big patterned paper with the Santa at the toy store and the Xmas tree. Pop dot that to the bottom of the card. Cut out tag off of the tag sheet of pp and adhere to card board and pop dot that to the card. Make flowers, one large one smaller in different patterns and out together with the brad. Pop do that to the corner on the tag on the front of the card.


Thursday, October 18, 2012

Little Red Riding Hood


Little Red Riding Hood 2010
Designed by: Carla Oliveira http://carlascuriouslycraftychaos.blogspot.com/
Featuring Graphic 45 Happy Haunting paper line.

I made this lay out with a picture of my beautiful daughter Mariah. She dressed up to go to a Halloween party and took this picture of herself, which I then snagged off of facebook. Gotta love that! Because I never get to take pictures of her anymore, whenever I have a chance to steal one that she has taken I do! This was her first Halloween party that she had ever dressed up for an gone to! She borrowed the costume from her Aunt Heather who had worn it the previous year.

Use the Fright Night pp as the base of the lay out. Next piece of paper is the Trick or Treat pp, trim it down about an inch on each side and distress the edges. Use man on the moon and word play pp and make a photo mat, also distressing the edges. Angle and layer and add photo. Hand fussy but the fence from midnight magic pp, pop dot to the bottom of the page. Add clock stickers to chip board and cut out. Add these clocks to G45 flowers, and add little gems to the middle of the clocks. Pop dot clocks to the right side of the page. Add purple stickers strip to the right side of the page. Add pumpkin sticker strip to the left side. Add Halloween sticker to the top of the picture. Use tag and brad and add to the bottom of the picture. Add Happy Haunting ticket stickers in between flowers. Fussy cut witch and broom from man on the moon paper, and pop dot to the corner of the picture. Add Halloween greetings stickers to the picture. Fussy cut moon face and add next to the picture.


Thursday, October 4, 2012

Graphic 45 Happy Haunting photo box by Carla Oliveira


 This is a photo box that I made using the Graphic 45 Happy Haunting line which I love! My mom who spends her winter months as a snowbird in AZ (lucky her) started making these last winter. When she told me about them I did not quite know what she was talking about and she never sent me a picture of them. When she got home in the spring, I of course had to see some of the ones that she made, and of course I asked for the pattern which she gladly gave me. Up until now I had not made one.
When I received this paper line from the Hens Den to work on my October projects I knew exactly what I was going to do! So here is the photo box that I made. 

Directions: Take the pattern and start cutting out your boxes with the following papers: Box #1 Cut out using Enchanted Garden. This is the biggest box, then start working your way down to the smaller ones. Box #2 Cut out using Pumpkin Time. Box #3 Cut out using Word Play. Box #4 Cut out using Trick or Treat. You will then cut out mats to fit on the insides of the boxes as follows: Box #1 cut (4) 3 1/2 by 3 1/2 squares with the Enchanted Garden and adhere to box one using the opposite side of the paper. Box #2 cut (4) 3 by 3 squares with the Pumpkin Time and adhere to box one using the opposite side of the paper. Box #3 cut (4) 2 1/2 by 2 1/2 squares with the Word Play and adhere to box one using the opposite side of the paper. Box #4 cut (4) 2 by 2 squares with the Trick or Treat and adhere to box one using the opposite side of the paper. Now you are ready to assemble your box. Add your mats to all of the squares on the inside of the box and fold the box together. Cut out the lid using the pattern with the Jolly Jack O Lantern paper, fold and glue together. Decorate your lid with Happy Haunting tag. Ink the edges, and add fiber. Cut the ribbon of bats to make separate bats and glue around the edges of the lid. Add button skeleton to the tag. 
Use whatever Halloween embellishments you have and start decorating the inside pages of your box. Now that your box is together you can either add your own fun Halloween pictures to it or you can give it to a friend as a gift!
Supplies: Graphic 45 Happy Haunting pattern paper Graphic 45 Happy Haunting Chip board tags #1 Graphic 45 Happy Haunting stickers Tim Holtz distress ink Spiced Marmalade Ribbon of bats Fiber Halloween decorative buttons Jolees Boutique dimensional stickers Martha Stewart Halloween stickers

Don't forget, there is a giveaway going on, Don't forget to go to Charlie's post and leave a comment!


Thursday, September 20, 2012

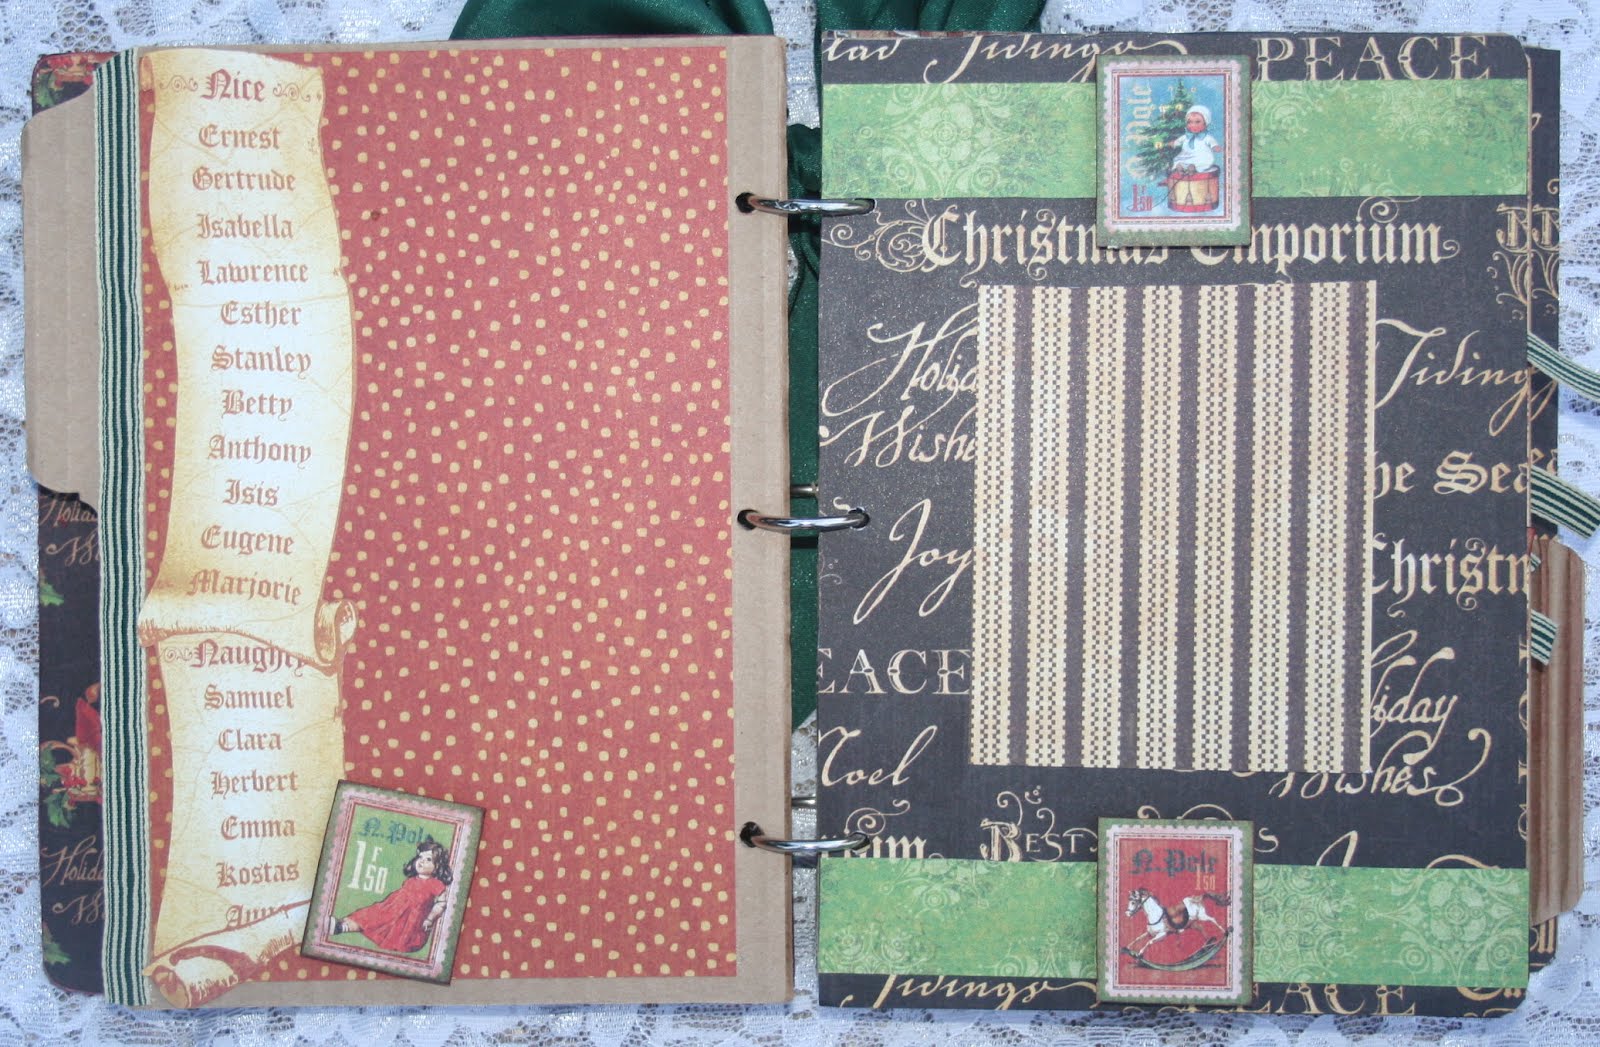
Graphic 45 Christmas Album by Carla


Created by: Carla Oliveira (http://carlascuriouslycraftychaos.blogspot.com/)
Featuring : Graphic 45 Christmas Emporium line


Instructions:

Cut out all your tags and stamps off of the Special Delivery sheet, and adhere to your chip board.

Ink around all of the edges.

Adhere your selected papers to the selected album pages and start putting the ablum together. I started with the cover and worked my way from page to page using just the G45 paper line, chip board, ribbon and stickles.

This made for a very clean and simple mini album that you could give away as a gift to anyone who would then be able to add their own photos of their Christmas traditions.


Products used:
Chic Mini album (Shabby Chic)
G45 Christmas Emporium sheet
G45 Special Delivery sheet
G45 Happy Holidays sheet
G45 All I want for Christmas sheet
G45 Joyous Noel sheet
G45 Merry and Bright sheet
May Arts Sheer Woven Rosettes Burgandy
Maya Road Candy Stripes Ribbon, green
Chip board
Ranger Distress ink Forest Moss
Ranger Distress ink Aged Mahogany
Ranger Distress Stickles Fired Brick


Related Posts Plugin for WordPress, Blogger...