Friday, March 30, 2012

Time for another Weekend contest!


How to enter: 


Do one or more of the items below and leave a comment for each opportunity you participate in by SUNDAY at 8pm PST. 


1. Leave us a comment 


Additional chances - Each item gives you 1 entry into the giveaway


2. Follow The Hens' Den on Google Friend Connect and leave a comment that you are a new follower! (Just click the blue link on the right that says "Join This Site")


3. Like The Hens' Den on Facebook - you can just click on the right in the Facebook Like box - and leave a comment (If you allready like me on Facebook - leave a comment that you like me!


4. Share this link with the giveaway to your friends on Facebook and comeback and leave comment with your link.


5. Follow us on Twitter and come back and leave a comment with your link (If you are allready a follower - leave us comment with your link)


6. Tweet about the giveaway - come back and leave a comment with the link you shared.


Random drawing will be held Sunday evening at 8pm PST and winner will be announced on Monday! 


Good luck and have a great weekend!! 


Thursday, March 29, 2012

Cup of the month with Cheri using My Minds Eye - Be Happy

So this month I used the My Minds Eye papers and some stickles! I am loving this line "Be Happy". The sayings on the papers are adorable!!


1. Using my cups' template I traced and cut out the "Honey Pink Paper"
2. I cut a large Honeycomb shape from the "bridsong" paper and matted it using the reverse blue dots side, I used frayed burlap around the edges so it give it a little pop off of the paper.
3. Adhere the cut-out onto the center of the Honey Pink Paper and add stickles to the flowers and bird. 
4. Cut a 1.5 inch strip using the top of my template from the back side of the birdsong paper. 
5. Using a decorative punch, punch one edge of the strip you just cut.
6. Ink the edge of the decorative edged strip and add stickles to the dots.
7. Adhere your strip to your page.

This was a quick easy one this month using a quote from the paper. This is perfect for those cups that don't have a lot of wiggle room. 


Cheri's Blog

Wednesday, March 28, 2012

Mini Album by DT Member Becky Garrison using Bo Bunny - Timepiece


Don't you love it when you can use almost every last scrap from your supplies?  I know I do, and this project is just perfect for using up those last bits and pieces!  Once again I used the Bo Bunny 'Timepiece' collection from The Hens' Den store.    The album is purse or pocket sized, coming in at only 3" x 4 1/4" x 1/2" folded and tied, or 4 1/4" x 20" when it's opened up.  And not only is it pretty folded and tied, it looks really pretty on a shelf or mantle all opened up for everyone to admire.  Here is the front of the album ...


and the back ...


and the front side when it's opened up ...


and the back side when it's opened up ...


Not counting the front and back cover and the flap, there are 10 pages for pictures, journaling and ephemera.  Before I show you how it all came together, let's talk about the supplies that I used ...

From The Hens' Den store ....


Other supplies used include 12" x 12" Bazzill 'oatmeal' card stock, brown pigment ink pad, small bit of lace from my stash.

Tools used include paper trimmer, scissors, ruler, craft knife, sewing machine with cream thread.

Now to make the 'structure' of the album is very easy!  I started with a 12" x 12" piece of card stock, and ...

  • Cut off one inch (1") on one side of the paper to make it 11" x 12".
  • Now cut two strips 4 1/4" x 12".  You will have some left over, and it's great for journaling or matting your pictures on!
  • Score each piece at 3", 6" and 9" so you will have three (3) 3" wide sections per strip and one 2" section.
  • Crease each of the folds.
  • Glue one of the 2" ends onto the back of one of the 3" piece of the other strip of card stock.  Use a bit of the 1" strip you cut off earlier, cut to 4 1/4" long, and glue it in to fill the space to make the glued pieces even. See the picture below.


  • Once you have both pieces glued together, you should have one piece 4 1/4" x 20" with 6 sections that are 3" x 4 1/4" and one section (flap) that is 2" x 4 1/4".  You need to make one more score on the end with the 2" flap at the 2 5/8" mark from that end.  This will give you one section that is 3/8" for the 'binding' and one section that is 2 5/8" for the flap.
  • Now, using brown ink, ink all of the edges, including both sides of the folds, and on both sides of the paper.  ALL edges and creases should be inked.
  • Next, fold all the creases in an accordion (back and forth) motion until it's all folded up, and the flap (in your right hand) is folded over the top.  This is how your book will look!  You might even want to mark the front, back, and inside/outside flaps with a pencil so you'll know where you are working.  The marks will be covered when the album is finished.
(Note:  If you want to use 8 1/2 x 11" card stock, you will just cut the card stock in half length wise, score at 3", 6", and 9" on 1/2 and 3", 6", 9" and 9 1/2" on the other half.  All other steps are the same.)

Next, let's work on the ribbon that will be tied to hold the album closed.  It is attached to the very back page - another good reason to mark your pages before starting.  I sewed mine on, but you can glue it just as well.  Here is a picture of that 'page' ...


Do you see where the ribbon is sewn on?  You can put the paper on the page first, or you can do sew (or glue) the ribbon on first and then cover it with paper.  To make yours just as I did, you will need to ...

  • Cut a piece of patterned paper at 2 7/8" x 4 1/8",
  • Ink the edges of the paper with brown ink
  • Adhere the ink to the BACK of the book!  This should be the page next to the flap on the outside.
  • Cut your ribbon to length, 
  • Sew it in a rectangular pattern onto the page where you adhered the patterned paper, right in the center.
Now we are on to doing the rest of the album!  You will need to cut 11 pieces of patterned paper at 2 7/8" x 4 1/8", and two pieces each at 1 5/8" x 4 1/8" and two pieces at 3/8" x 4 1/8".  Ink the edges of all with brown ink, then adhere them any way you want to the pages of the book.  The 4 smaller pieces are for the flap and the 1/2 inch 'binding'.

And then the fun begins!   Cut photo mats from coordinating card stock and patterned paper for pages where you want photos.  Also, add bits and pieces for decorations.  I used the rub ons and dimensional stickers from the Bo Bunny Timepiece line to decorate mine.  If you want to get more creative you can add pockets, tags, flip pages, and all kinds of fun decorations.

I hope you will enjoy this album ... it is so easy to make, and you can use any products you want.  I think it would be a great 'grandma's brag book' because of it's small size!   Thanks for joining me today!  Becky


Tuesday, March 27, 2012

Tuesday spotlight! Debut - Chic Album "SWEET CHIC" mini album


INTRODUCING: Exclusive Hens' Den, "Chic Albums"

"Sweet Chic" - measures 5.5 x 5.5 
$5.89  

 Total of 6 pages. Includes 2 covers - one chipboard scallop and one chipboard scroll. 2 corrugated pages, 1 burlap scallop page, one pocket page and two bonus mini pockets - one canvas and one chipboard. (Burlap/canvas varies upon availability).  


This little album is so adorable I had to share my example using the 
NEW GRAPHIC 45 collection Little Darlings. 


To purchase this album in the store click {HERE}.

Monday, March 26, 2012

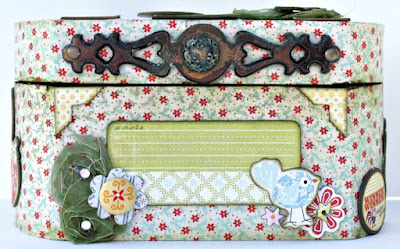
New Kit: Basic Grey - Picadilly - Recipe Box Kit


Recipe Box Kit
Designed by Charlie LaBonte
$35.00

Using Basic Grey Piccadilly Collection

Includes: Picadilly & Graphic 45 embellishments. Ribbon, bling and an old drawer pull for the front of the box. All pages and papers are pre-cut and comes with fully detailed photograph instructions.

Such fun to make.  A recipe box.  It is something you can make and give as a gift or keep and start passing down through the family with YOUR favorite family recipes.  

Quantities are very limited, be sure to get yours before they are all gone. Click {HERE} to purchase yours today!


Weekend Contest Winner - Congratulations....


Congratulations to:

Jean!

Jean said: Such a gorgeous weekend! Thanks for the chance to win!


Please e-mail your information to Charlie at info@thehensden.com, you have two weeks to claim your winnings.

Friday, March 23, 2012

Weekend Giveaway


How to enter: 


Do one or more of the items below and leave a comment for each opportunity you participate in by SUNDAY at 8pm PST. 


1. Leave us a comment 


Additional chances - Each item gives you 1 entry into the giveaway


2. Follow The Hens' Den on Google Friend Connect and leave a comment that you are a new follower! (Just click the blue link on the right that says "Join This Site")


3. Like The Hens' Den on Facebook - you can just click on the right in the Facebook Like box - and leave a comment (If you allready like me on Facebook - leave a comment that you like me!


4. Share this link with the giveaway to your friends on Facebook and comeback and leave comment with your link.


5. Follow us on Twitter and come back and leave a comment with your link (If you are allready a follower - leave us comment with your link)


6. Tweet about the giveaway - come back and leave a comment with the link you shared.


Random drawing will be held Sunday evening at 8pm PST and winner will be announced on Monday! 


Good luck and have a great weekend!! 


Thursday, March 22, 2012

Layout by Charlie using Simple Stories Fabulous collection


I love this paper line.  It is so bright and fun.  You can hardly go wrong with it.  Autumn is 3 months old and already worried about her body...lol.   Notice how she is all covered up....
I layerd 3 of their pages and used Tim Holtz Distress Ink Frayed Burlap on the main page and then used both Antique Linen and Fray Burlap on the 3rd layer.   I scruffed up the edges of the 3rd layer a bit ( my first time at attemping to get scruffy with the edges)   Then I layerd the photo using Bazzill card stock.  I wanted to pull the colors out of the picture.   I hot glued the embellishments as a few of them were a bit heavy.    The phone is mounted on chipboard and I cut it out from one of their journaling cards.  I also cut out the word "girl" from another of their journaling cards.

Supplies Used:
Simple Stories "Fabulous" paper line, pages Kraft Grid/Typwriter4 x 6 Journaling Card Elements #2, Sweet and 100% Girl
Tim Holtz Distress Inks: Frayed Burlap and Antique Linen
Prima Marketing:  Shabby Shic Treasures and Wood Trinkets
Maya Road Ribbon: Striped Green and Cream
Petaloo Flowers - Darjeeling Hydrangea Cream and Green

Thank you for Visiting.


Related Posts Plugin for WordPress, Blogger...