Showing posts with label Pink Paislee. Show all posts

Wednesday, March 21, 2012

9th Birthday Celebration layout by Nicolle Cramer using Pink Paislee Soiree and Daily Junque


9th Birthday Celebration


Designed by: Nicolle Kramer
Featuring: Pink Paislee Soiree and Daily Junque Collections


This layout was inspired by my daughter Jolie's 9th birthday. This picture is of one of the favorite presents her oldest brother Ryan bought her. Jolie loves the Twilight movies and her favorite character is Jacob. "He's just the cutest", she says. Definitely team Jacob. She got a t-shirt and bracelet. She had to try it on right away.


Supplies:


Pink Paislee Daily Junque - Tickets
Pink Paislee Soiree DiamondPink Paislee Soiree FloralPink Paislee Soiree MusicPink Paislee Soiree WordsPink Paislee Soiree Chandelier CrystalsPink Paislee Soiree FlagsMy Minds Eye Stella & Gertie Delightful TrimsEcho Park Summer Days Epoxy BradsEcho Park Playground Alpha Stickers
Echo Park Summer Days Chipboard Accents. White Cardstock, Soiree Rhinestone chain, pink paislee foam stickers


Preparing Your Page Components:
  • 12x12 Daily Junque Map paper as base distressed edges and inked.
  • Cut a 6"x8" of daily junque tickets paper border punched on sides and inked.
  • Cut 4 1/2" x 6 1/2" from soiree words paper and 4 1/4"x 6 1/4" from white card stock.
  • Cut 2" x10" strip from Soiree diamond paper. Cut 10" from blue Stella & Gertie delightful trim.Cut 1 1/2"x10" strip from soiree diamond paper and border punch the strip. Cut 1 1/2" x 6" strip from white card stock and border punch.
  • Cut 1", 1 1/2" and 2" circles from soiree words,music and daily junque tickets papers.
  • Cut 1/2",1" and 2 1/2" circles to make spiral flowers from soiree words,collage and daily junque tickets papers.
  • Fussy cut flowers from soiree floral paper and punch flowers from soiree collage and music papers. Fussy cut banner and other elements from soiree collage paper.
  • Made banner from soiree words and music paper.
  • I put 3 flags from the soiree flags to one of the stick pins provided.
  • String 6 chandelier crystals to rhinestone chain.
Assembling your page:
  • Glue the the 6"x8" daily junque ticket paper to the 12x12 base daily junque maps paper. Center it off to the left of the paper. Glue yellow stella and gertie trim to botton along with punched 1 1/2" x 6" white strip.
  • Glue photo to the 4 1/4"x 6 1/4" white cardstock and that to the 4 1/2" x 6 1/2" soiree words paper. Adhere with foam squares to the left side of the daily junque maps paper.
  • Glue blue stella and gertie trim to the 2"x10" soiree diamond paper (side A showing) and glue 1 1/2" border punched strip (side B showing) to the blue trim. Glue all layers over photo. Add with Epoxy brads the strung chandelier crystals. Adhere the cut circle pieces as shown in photo above around top and photo. Add the number 9 alpha to the circle on right of picture and add banners as shown.
  • Glue flag, fussy cut and spirals flowers to bottom left of photo.
  • Glue fussy cut elements and punched flowers to bottom right of page.
  • Add journaling and icecream chipboard to bottom right of photo.
I used a pagemaps sketch for inspiration.


Thursday, March 8, 2012

"Baby Shower" 2 page layout by Krystle using Pink Paislee


"Baby Shower"
Designed by: Krystle Thomas
Featuring: Pink Paislee's Soiree


Supplies:

Pink Paislee Soiree Collage
Pink Paislee Soiree Diamond
Pink Paislee Soiree Floral
Pink Paislee Soiree Music
Pink Paislee Soiree Trellis
Pink Paislee Soiree Words
Pink Paislee Soiree Dimensional Stickers
Maya Road Organza Primrose
Maya Road White Satin Pleated Ribbon
Teresa Collins Blingage Ty's Stars
Bazzill Basics Midnight Cardstock

Steps:

1. Use Pink Paislee Soiree's Music and Diamond double-sided pattered papers as your background.

2. Cut out circles, tags, and pendents with Pink Paislee Soiree's Collage, Diamond, Floral, Music, Trellis, and Words double-sided patterned papers. Layer them with your photos and mementos.

3. Cut out circles from Pink Paislee Soiree's Floral double-sided patterned paper, and fold each circle in half to create a dimensional banner.

4. Mat everything with Bazzill Basic's midnight cardstock.

5. Add Pink Paislee Soiree's Dimensional Stickers.

6. Mist Maya Road's Organza Primrose with your favorite mist.

7. Create a handmade flower with Maya Road's White Satin Pleated Ribbon. Cut out a circle the size of your desired flower and cover the circle with double-sided tape. Take the ribbon and place one edge in the middle of the circle. Wrap the ribbon around the center until you get to the edge of your circle. Cut off the end and viola -- you have a lovely flower.

8. Add these flowers to your layout along with Teresa Collins' Blingage Ty's Stars to create an embellishment cluster.


Wednesday, February 15, 2012

Fancy Pants Designs It's The Little Things Collection - "Our Kids" by Sesil Cratin


“Our Kids”
Designed by: Sesil Cratin
Featuring Fancy Pants It’s The Little Things Collection


Preparing and cutting:
  • Cut cream card stock to 11.5 x 11.5 
  • Cut Strips paper to 8”x 4” to make sure you cut the white bird on the page.
  • Cut Bird Cage paper 9” x 3”
  • Cut Feathered paper 11.5”x1”, 2”x.5” and 2” x .5”
  • Cut out two flowers out of the humming bird paper
  • Cut out a card out of the shuffle paper
  • Cut four birds paper to 6” x 1” and cut out a decorative edge.
Assembly:
  • Adhere the cut cream card stock to a black cardstock. This should produce a nice frame around the cream card stock.
  • Adhere the Bird cage paper (dot side up) to the 8x4 strips paper creating an overlap with the papers.
  • Add the 11.5” x1” feathered paper to the top of the bird cage paper but under the strips paper.
  • Adhere picture on top of the collage.
  • Adhere the decorative edge paper to the top of the photo.
  • Tuck and adhere the card to the back of the collage and photo on the left side of the paper.
  • Add cut out flowers to the left side of the collage and the top right corner of the collage.
  • Add strips of pattern paper to the top and bottom corners of the layout to frame out the layout.
  • Add chipboard pieces to the layout.
  • Add buttons to the layout
  • Add title to the layout
  • Add rub-on “life is good” to the layout.

Wednesday, February 8, 2012

Pink Paislee Soiree Birthday Bash Card by Theresa The Scrapbooking Queen


Title: Birthday Bash Card
Designed: The Scrapbooking Queen www.thescrapbookingqueen.com
Featuring PinkPaislee ~ House of Three ~ Soiree Collection


This paper collection from PinkPaislee is so bright and
cheery and really is great for the layered look which
The Queen used on this fabulous birthday card.
The Queen just love all of the PinkPaislee collection.

The Queen used her EK Success Binder Edge punch for the first layer
this work really well for The Queen to use her Royal Twine
in blue, mint and pink... remaining layers are the awesome
designer collection from PinkPaislee Soiree Collection

PinkPaislee Dimensional Stickers are perfect for
adding some bling to this Birthday Card.  Don't you just love it..

Supplies Used
White Paper Stock 
Royal Twine Blue, Mint & Pink
EK Success Punch Binding Edge
ATG Tape 

Don't forget we have a CONTEST this entire week, click {here} for details!

~~~~~~~~~~~~~~~~~~~~~~~~~


Thursday, February 2, 2012

Scrapbook Layout "SOAR" by Nicolle Kramer using Pink Paislee soiree and Daily Junque


"SOAR" by Nicolle Kramer
http://nicollelovesscrapbooking.com
Featuring: Pink Paislee House of Three Daily Junque and Soiree


I love these photos from my oldest son Ryan's high school graduation. Time sure does fly by. Feels like his first day of kindergarten was just yesterday.

Supplies:

Bazzil Basic Paper Black
Bazzil Basic Paper White
Pink Paislee House of Three Daily Junque Junque
Pink Paislee House of Three Daily Junque Tabs
Pink Paislee House of Three Daily Junque Tickets
Pink Paislee House of Three Soiree Chandelier Crystals
Pink Paislee House of Three Soiree Flags
Pink Paislee House of Three Soiree Wood Shapes
Yellow Trim: The Hens Den
Misc. items: Flowers, Alpha's, border punch, pearl, white acrylic paint, foam square adhesives.

Preparing Your Page Components:
1. Measure 1" on all 4 sides of Black Bazzil Basic Paper and cut out 10" square.
2. Punch around page of Pink Paislee House of Three Daily Junque Junque. I painted a brick pattern with white paint in the center of page.
3. Cut 4 1/2" x 6 1/2" and 4 1/2"x4 1/2" pieces from White Bazzil Basic Paper .
4. Take 10"Black Bazzil Basic Paper cut 6"x8" and punch around edge.
5. Cut 3"x12" strip from B side of Pink Paislee House of Three Daily Junque Tickets and cut along bottom of design to create a border. Cut 1 1/2" x12" strip from White Bazzil Basic Paper and punch.
6. Fussy cut elements from Pink Paislee House of Three Daily Junque Tickets and numbers 2011 from A side of Pink Paislee House of Three Daily Junque Tickets
7. Cut 12" from yellow trim and roll to create a flower.
8. Add 2 flags to 2 pins from Pink Paislee House of Three Soiree Flags and 3 flags and 2 chandeleirs to the wooden stick.
9. Ink edges of wooden piece with black ink.

Assembling Your Page:
1. Glue Pink Paislee House of Three Daily Junque Junque to 12x12 Black Bazzil Basic Paper with 10'" square cut out.
2. Glue 4 x6 photo to 4 1/2" x 6 1/2" White Bazzil Basic Paper and then attach that with foam squares to the punched 6"x8" Black Bazzil Basic Paper.
3. Glue 4"x4" photo to 4 1/2"x4 1/2" pieces of White Bazzil Basic Paper .
4. Attach photos over painted brick area of Pink Paislee House of Three Daily Junque Junque paper with foam square adhesives for dimension.
5. Attach the 3"x12" strip from B side of Pink Paislee House of Three Daily Junque Tickets, the punched 1 1/2" x12" strip from White Bazzil Basic Paper and Soiree flag under photos.
6. Attach fussy cut elements, wooden arrow, stick pin flag and flowers to bottom left side of left picture.
7. Attach a stick pin with flags and fussy cut flowers to top right corner of smaller picture.
8. Attach the wooden stick with 3 flags and 2 chandeliers to top left of layout.


Nicolle's Blog
*I used a Creative Scrappers Sketch for inspiration.

Monday, July 25, 2011

Thank you! And some Pink Paislee - Soiree Card layout inspiration by team member Carla

First we would like to thank everyone for participating in the polls we posted on Facebook this last weekend, it was fun to see all the new releases and reveals from CHA and what YOU have on your wish list!

We love how Carla  used the Soiree line by Pink Paislee to create these absolutely cute cards.


Products used you can view HERE. Thank you Carla for such great inspiration!

Don't forget there is still 20% off all products in the month of July!


Wednesday, July 13, 2011

Maya Road Canvas Mini Album and Pink Paislee inspiration from team member Carla

I love what team member Carla did with this fun canvas album by Maya Road and the Pink Paislee Soiree line!!

  Maya Road canvas mini album was glimmer misted with blue and pink on the canvas as well as the inside chipboard. Punch hole in pocket, add Soiree chandelier crystals to fiber and attach to the hole. White prima flower edged with distress stain broken china and also added distress stickles warm lipstick, attach to pocket. Added sticker to pocket.

 Distress stained the canvas inside page. Add square piece of pp. Fussy cut flowers out or pp and pop dot. Add stick and banner.

 Cut circle out of pp, add sticker and stick pin with banner.  Cut square out of pp, distress stain wood piece table. Hand cut vase out of pp, add distress stickles to vase, Add little flowers and sticker banner.

 Cut square of pp. Color wood pieces with distress stain, add sticker tea pot and small alpha words. Add gems to banner.  Cut banner at top and on the right side out of pp and add to page.

 Cut pp into pocket and add stitches. Add sticker to the middle. Make tag with pp and add fiber, slip tag into inside pocket. Cut square and fancy cut corners with punch. Add strips of fiber to each corner. Add stick pin and banner to right side.

 Tear pp and attach. Add sticker and banner. Cut circle and attach. Cut square and cut around edges with punch. Add sticker banners to all 4 corners, and add stickers on both sides.

  Cut pp and attach to page like a pocket. Add distress stickles as dots. Add sticker. Make tag out of pp and add fiber. Color canvas with distress stain, cut square and strip add to page. Add banner sticker and fussy cut flower out of pp to bottom. Color wood piece with distress stain and add the word party with stickers.


Fold pp in half like card and attach. Add flowers to corner and stick banner.


Thank you for such a great project Carla!!

Be sure to check out the store for supplies used, like the canvas album and Soiree line!

Friday, May 6, 2011

Lets start the Celebration, Giveaway, and National Scrapbooking Day!

 We are so very excited to announce the new kits in the store!

Each kit comes with:

  • Pre-cut paper ready to go!
  • All the goddies
  • Photographed DETAILED instructions.

If you have ever taken a class with Cheri you will know what kind of quality you are receiving. Her instructions are very easy to follow! We have never been more excited to have her make up class kits for sale available to those that are farther away than where she has been able to teach!


--------------------------------------------------------------------------------------


 CUTE and CHUNKY album has 8 board pages for a total of 16 pages with an additional 4 insert pages. Adhering to chipboard can sometimes be tricky I found that Claudine Hellmuth Studio Multi Medium works really well.


--------------------------------------------------------------------------------------


Created by Cheri Piles for The Hens Den
  

Once Upon a Springtime papers are so magical with the fairy's. Mini envelope album 5 pages (10 total) with 5 pocket inserts for additional photo's. 
***Optional items needed: Distress ink by Tim Holtz – Walnut stain. Bazzil cardstock if you would like to layer your pieces.


--------------------------------------------------------------------------------------

Created by Cheri Piles for The Hens Den

 This wonderful little album has 5 pages (ten total) and 5 insert pocket pages. *Optional items for album available in the store: Black soot distress ink by Tim HoltzBazzill cardstock in black and cream.


--------------------------------------------------------------------------------------

Created by Cheri Piles for The Hens Den

***Optional Items: White Studio Paint by Claudine Hellmuth, Spun Sugar ink stains byTim Holtz (Ranger). 


--------------------------------------------------------------------------------------

Created by Cheri Piles for The Hens Den


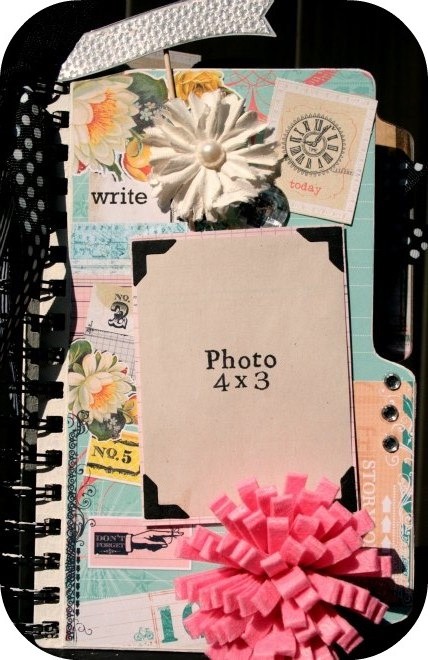
This book was designed in a way that you can add your photograph on the 1st journal page of each section, document it in the additional journal pages, add any additional photo’s in the photo insert pages and a place to keep pamphlets or tickets in the pocket page per section.

*Optional - for additional dimension you can ink all of your edges with Tim Holtz distress ink. If you decide you like the added look, it is easier to do this prior to assembling your album.
*Optional – photo corners in black. Matt your photo’s in black cardstock.


And now onto the giveaway!
I am giving away a BRAG Book KIT to one lucky winner!! The giveaway will last From Friday until Sunday at 8pm pacific time. All you have to do is leave a (that's one per person) comment!

For additional comment entries you may:
  1. follow the blog and comment that you followed us
  2. tweet the link to this blog post and come back and comment with your twitter name
  3. like us on facebook and come back and leave a comment that you liked us
  4. share the link on facebook and come back and leave a comment with your fb name
  5. blog about us and come back and leave your blog name when you comment

That's a total of 6 chances to leave a comment to win the kit!

There's MORE!! For every 50 comments we will add another kit to the giveaway! So if we get 100 comments we will add one of the other kits and so on and so on! 

Good luck to you all, I hope you like the new kits as much as I do! 

Have a wonderful National Scrapbook Day to you all!!


Related Posts Plugin for WordPress, Blogger...